Hosting existing apps
If you already have an application that you would like to bring into Diploi, you can import it using GitHub.
How to Import an Existing App into Diploi
Diploi offers two ways to import projects, by selecting the repo you want to import from a list of available repositories in your GitHub account or by using the URL of a GitHub repo, either a public one or your own.
-
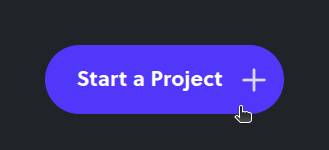
Start a new project
-
Then switch from “Start From Scratch” to the “Import Repository” tab

-
Now you can select the source code you want to import. You can either select a repository stored in your own GitHub account or use a URL to import a public repo.
-
Once you have selected the repository you’ll import, click on the “Analyze Repository” button. Diploi will then look for the configuration files (
package.json, ‘requirements.txt’, etc) and readme in your repository, to determine how to properly import your project to Diploi.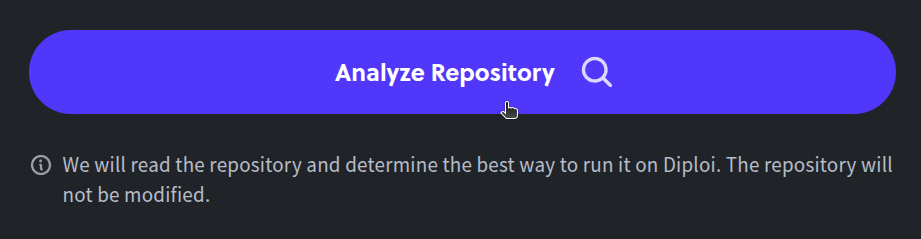
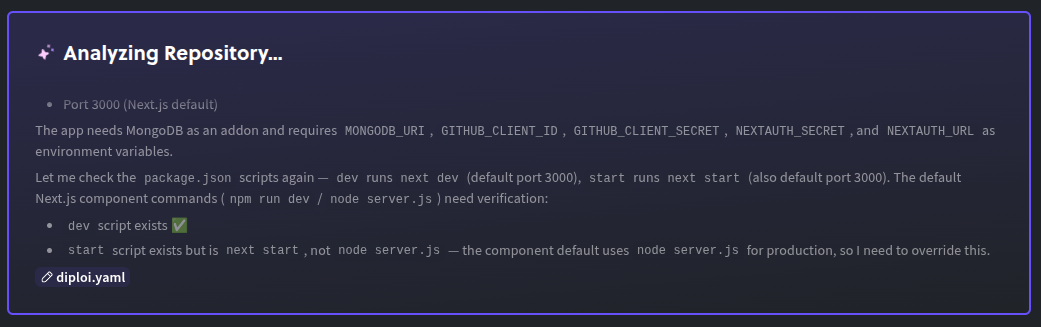
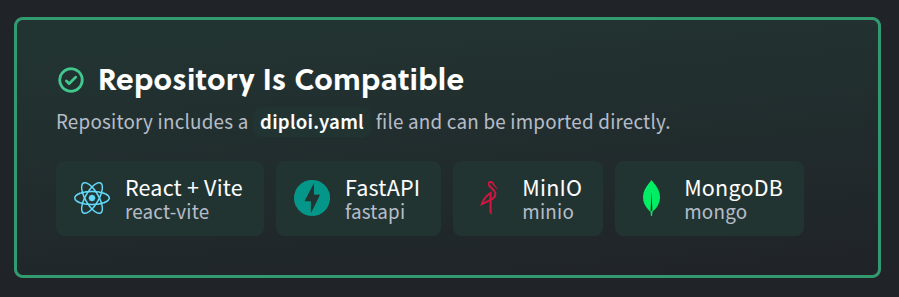
The import system will run an automated analysis, and conclude if your project can be hosted on Diploi or not.
-
After Diploi analyzes your repository, you’ll get a report which also tells you if you will need to do additional config work to properly host your application.
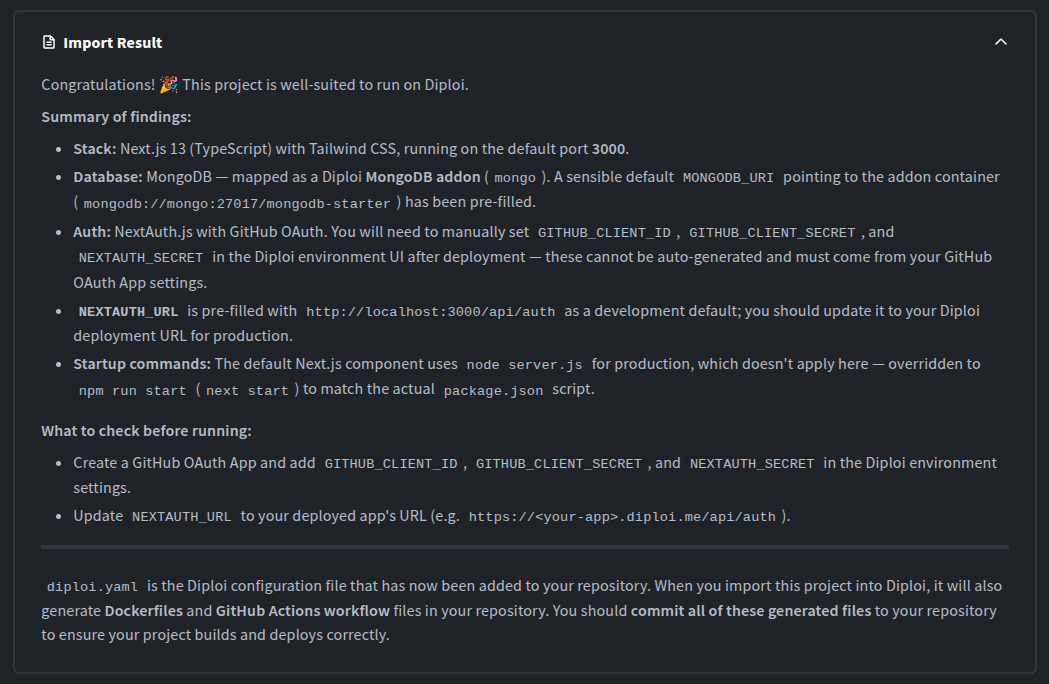
The import system will generate a custom
diploi.yamlfile for your app, and you can also expand it by adding additional components and add-ons, like additional databases or services. For more about how to use thediploi.yamlfile, click here.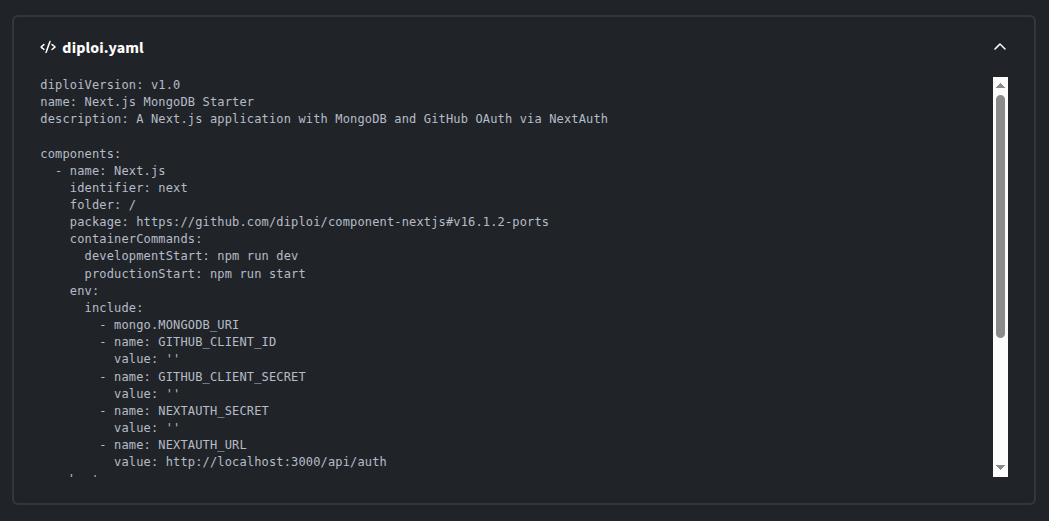
-
Now you should have a development deployment running. If your project is not loading properly or fails to start, check the deployment logs.
Other considerations
Run command config
By default, Diploi will use common run commands for development and staging/production deployments, so there might be some situations when your imported application might fail because your project uses different run commands. To handle these situations, you can either modify the Dockerfile and Dockerfile.dev created by diploi, or modify your app’s config to include the commands used by Diploi to run your application.
Importing an external public repository
When you can import a publicly available repository, which doesn’t belong to your GitHub account, you will have the option of creating a new repository in your account to store your code or start a project without a repository.
In case you choose to proceed without a repo, your project won’t be able to start a Production or Staging deployment, because Diploi creates a GitHub Actions workflow which takes care of creating a build of your project, which can be ran in Staging and Production.
Importing an app from a repository you own
When you import from a repo you own, Diploi will use the same repository by default to store your code, so any changes you make to your project can be pushed to the same repository you imported from.
Currently, you can’t import a repository and save it in a new repository.
Supported Applications
Although it is technically possible to import any application, not every app will work right away, and they might require additional work in order to run properly after you import them to Diploi.
You can import any application built with Diploi, or with any of these frameworks, databases, and technologies:
Components available
Add-ons available
Apps built on Diploi
Any application built on Diploi can be imported into a new project without any additional configuration. Diploi will provision any component and add-on specified in the diploi.yaml file, but with the caveat that any environment variables used in the project must then be set manually, since Diploi doesn’t store the project’s secrets on GitHub.
Apps built on Lovable
If you built a project on Lovable, you can seamlessly import it to Diploi. All you need to do is sync your application on GitHub.
For Lovable projects using Supabase, you can use the open-source version of Supabase that is available on Diploi. You can add Supabase by adding the snippet to your diploi.yaml file.
- name: Supabase identifier: supabase package: https://github.com/diploi/component-supabase#mainPaste the snippet within the components field in the diploi.yaml, usually found in the root of your project.
components: - name: Lovable ...
 - name: Supabase identifier: supabase package: https://github.com/diploi/component-supabase#main
If you would like a detailed walkthrough about how to import an application built with Lovable, click here to check our tutorial explaining how to do it. We also have a guide walkthrough explaining how to use Cursor for your imported Lovable app, which you can check by clicking here.
Running Supabase Migrations after Importing a Lovable App
If you are using the Lovable project with Supabase, you’ll need to run the necessary migrations, which should be stored inside your Supabase folder, as migrations.
You can apply the migrations to your new Supabase instance by running the command supabase migration up from the development environment created when you import the project.